How to Integrate Zoom with LearnDash LMS : Step-by-Step Guide
Integrating Zoom with LearnDash LMS is a game-changer for your online courses, allowing you to bring live, interactive sessions right into your virtual classroom. In this guide, we’ll walk you through two simple ways to make it happen: one using the “Video Conferencing with Zoom API” plugin and the other through a Zapier-based method. Both options are user-friendly, and we’ll break down the steps to help you decide which one works best for you.
Using the “Video Conferencing with Zoom API” Plugin
If you’re looking for an easy and efficient way to integrate Zoom with LearnDash, the “Video Conferencing with Zoom API” plugin is your go-to solution. This approach is perfect if you want everything to be managed smoothly within WordPress.
FEATURES:
- Manage your Zoom Meetings and Zoom Webinars.
- Manage Zoom users and Reports.
- Change frontend layouts as per your needs using template override.
- Join via browser directly without Zoom App.
- Show User recordings based on Zoom Account.
- Extensive Developer Friendly
- Shortcodes
- Import your Zoom Meetings into your WordPress Dashboard in one click.
- Gutenberg Blocks Support
- Elementor Support
Step 1: Install and Activate the Plugin
- First, log in to your WordPress dashboard.
- Navigate to
Plugins>Add New. - In the search bar, type “Video Conferencing with Zoom API.”
- Once you find it, click
Install Now, then hitActivateto get the plugin up and running.
Step 2: Configure Your Zoom API Settings
- Head over to the Zoom Marketplace (marketplace.zoom.us) and sign in to your Zoom account.
- Create a new JWT app to get your API Key and API Secret.
- Copy these credentials to your clipboard.
- Go back to your WordPress dashboard, navigate to
Zoom API>Settings, and paste the API Key and Secret into the fields provided. - Don’t forget to save your settings!
Here is The step-by-step process for Creating an app.
In order to setup the plugin you’ll first need a Zoom Account. So, sign up if you don’t have a Zoom account already or just sign in with your existing Zoom Account and follow the next steps.
Setup Server-to-Server OAuth
In order for you to setup the plugin, carefully follow all the steps below:
Creating Server to Server App type
- Goto Zoom Marketplace page from https://marketplace.zoom.us/
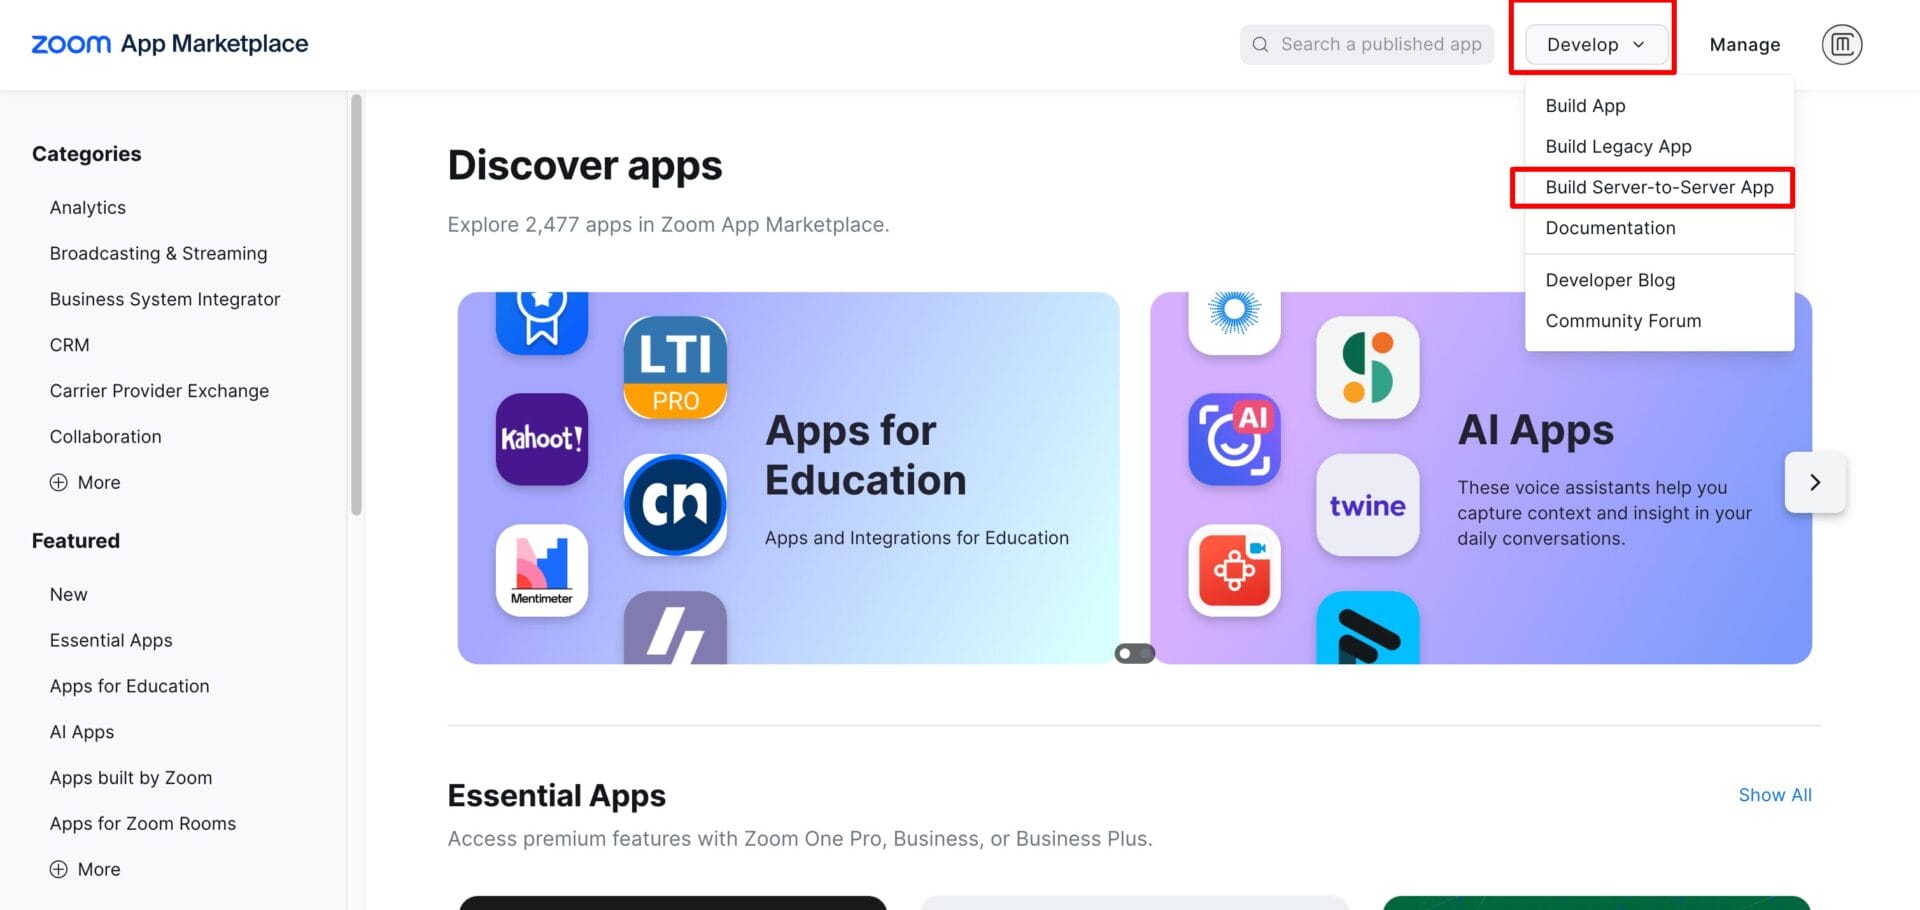
- Now, you will need to create a “Server-to-Server” App type from here.
- Hover on Manage dropdown and select “Build Server-to-Server App like shown in below image.
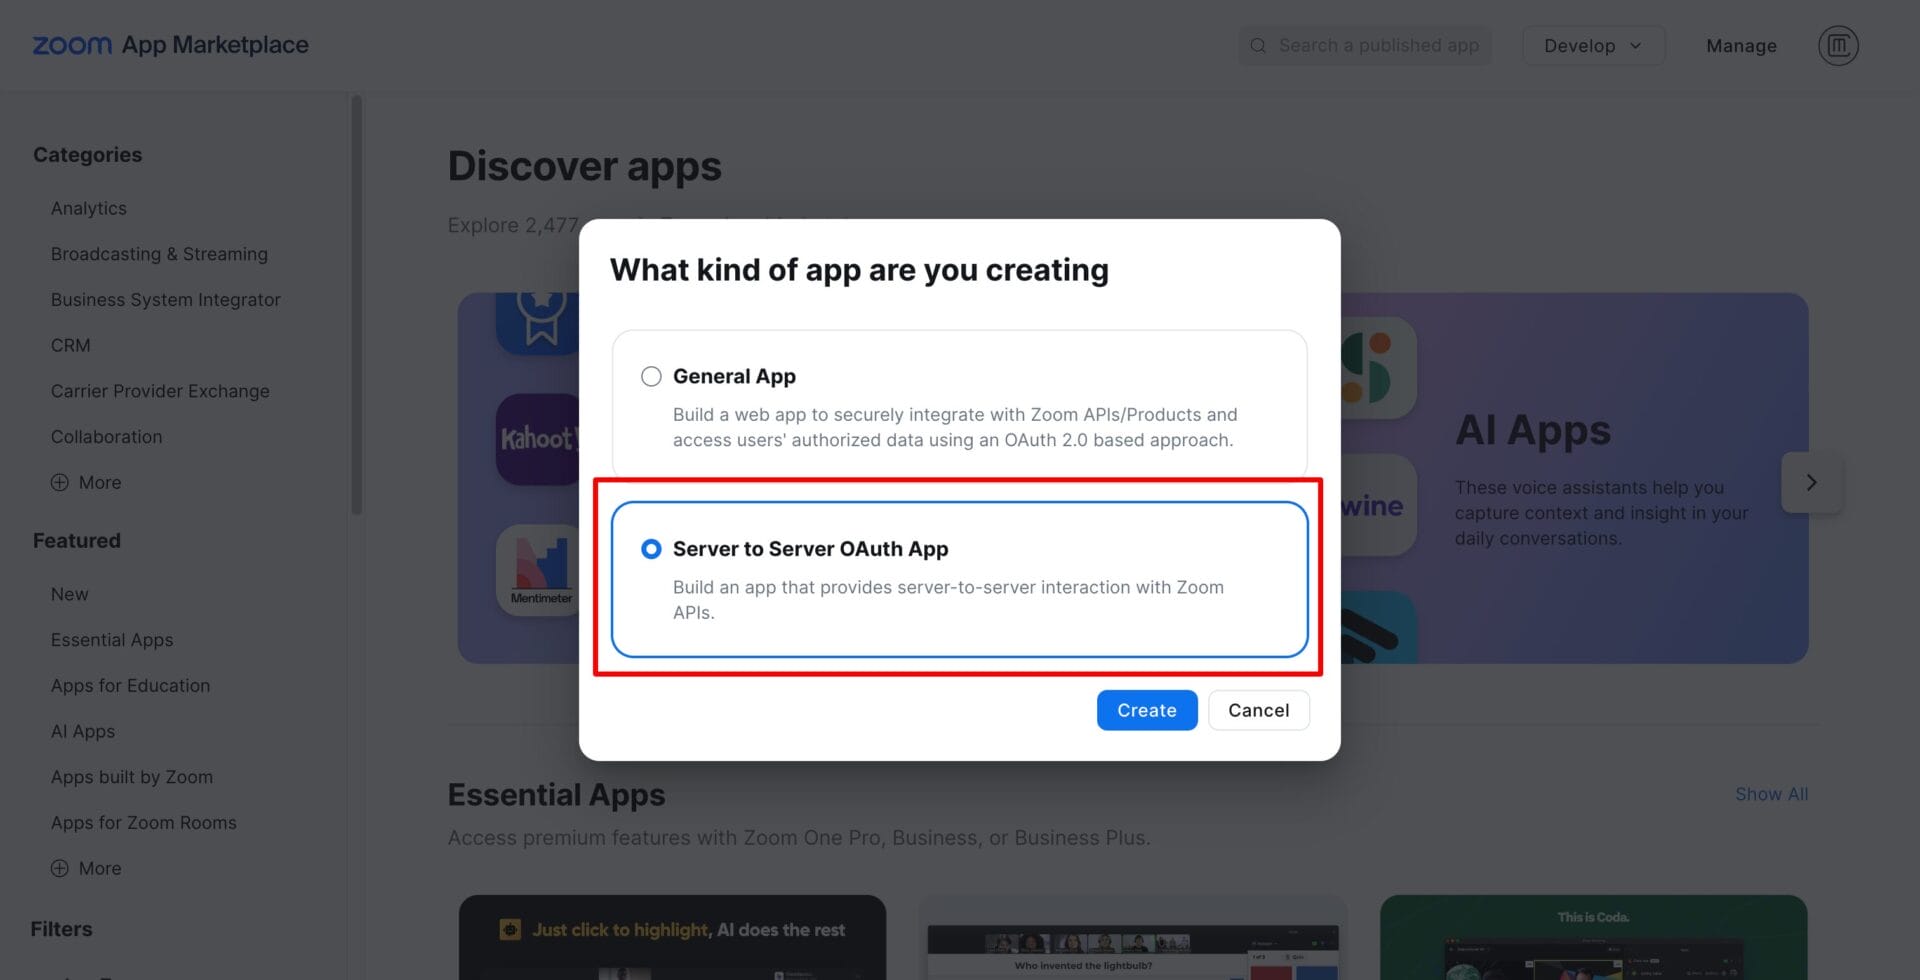
OR you can simply click this https://marketplace.zoom.us/develop/create and this will open a modal like in screenshot below.
Click on Server to Server OAuth App and click create.
Setting Up API Credentials:
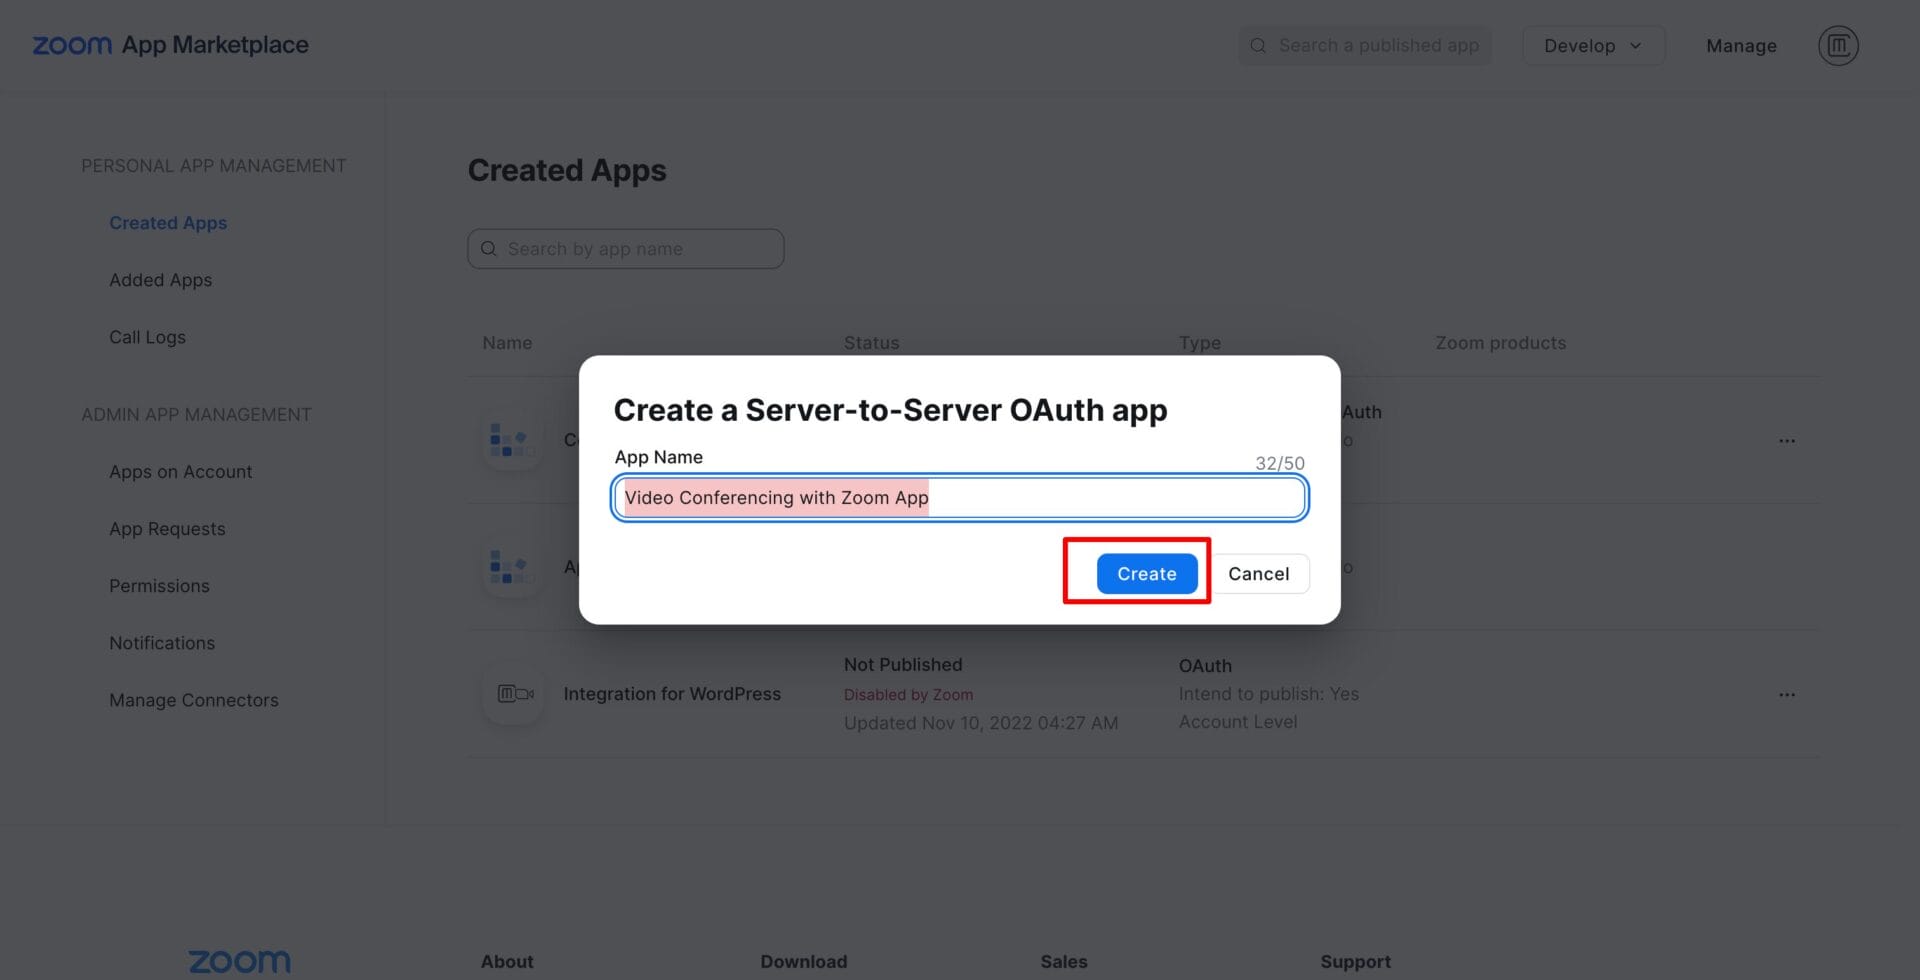
After you click on “Create” button in the popup you will be asked few details to fill up.
1. App Name
Add you app name to anything of your Preference so that you can remember that this app type is for your WordPress website.
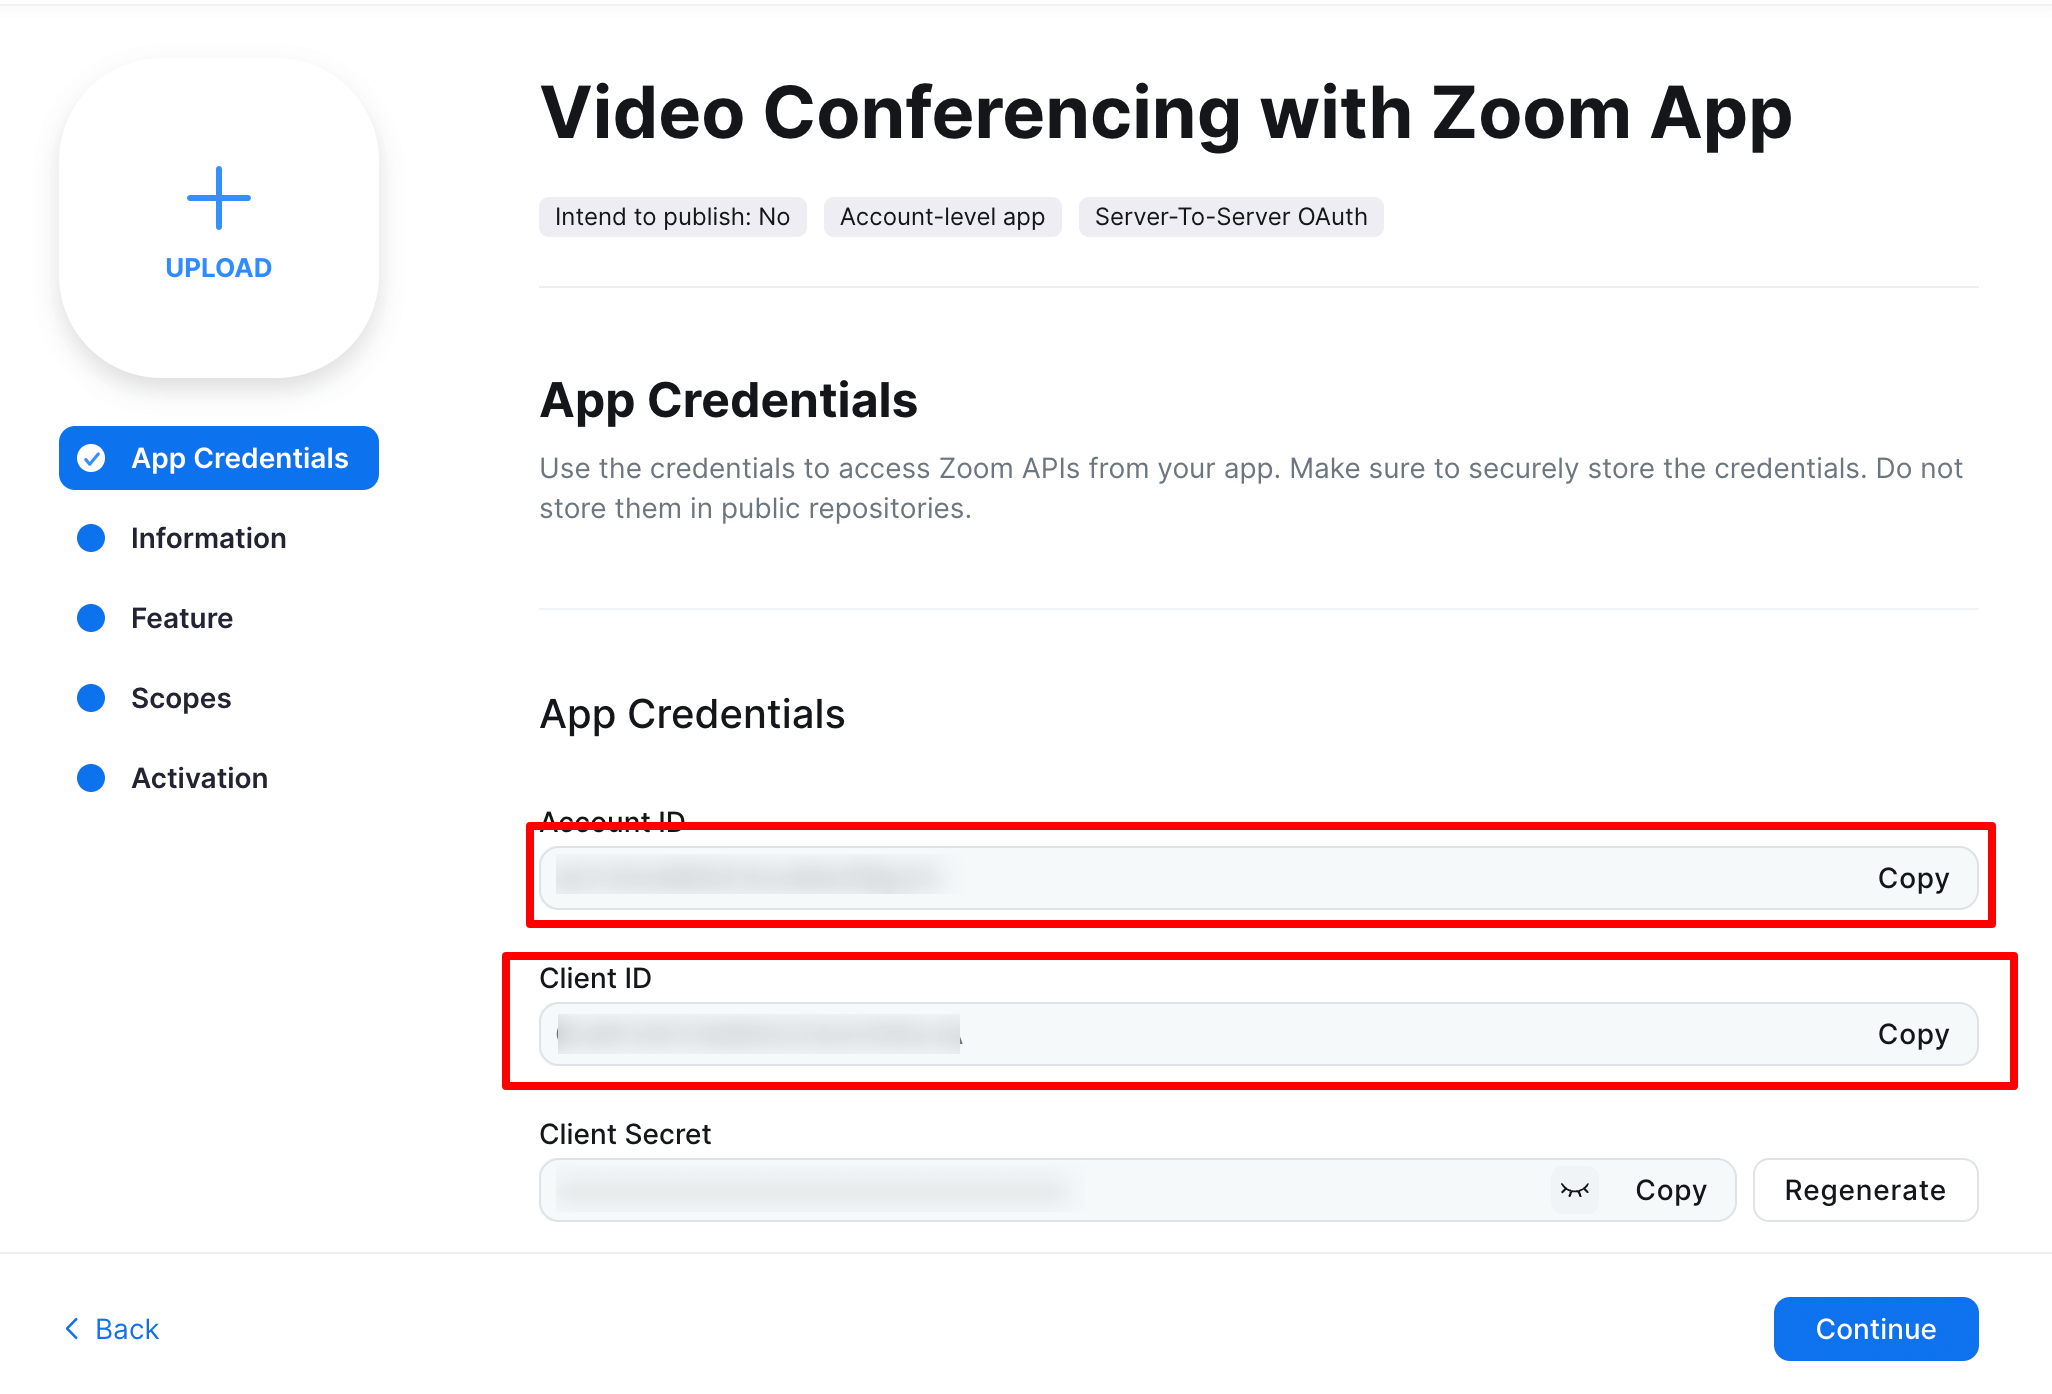
2. App Credentials
Once App is created – you will be taken to an App Overview page where you can see App Credentials. These highlighted credentials will be used in our WordPress Video conferencing Zoom plugin to connect with your account. We’ll get back to this in next steps. Click Continue for now.
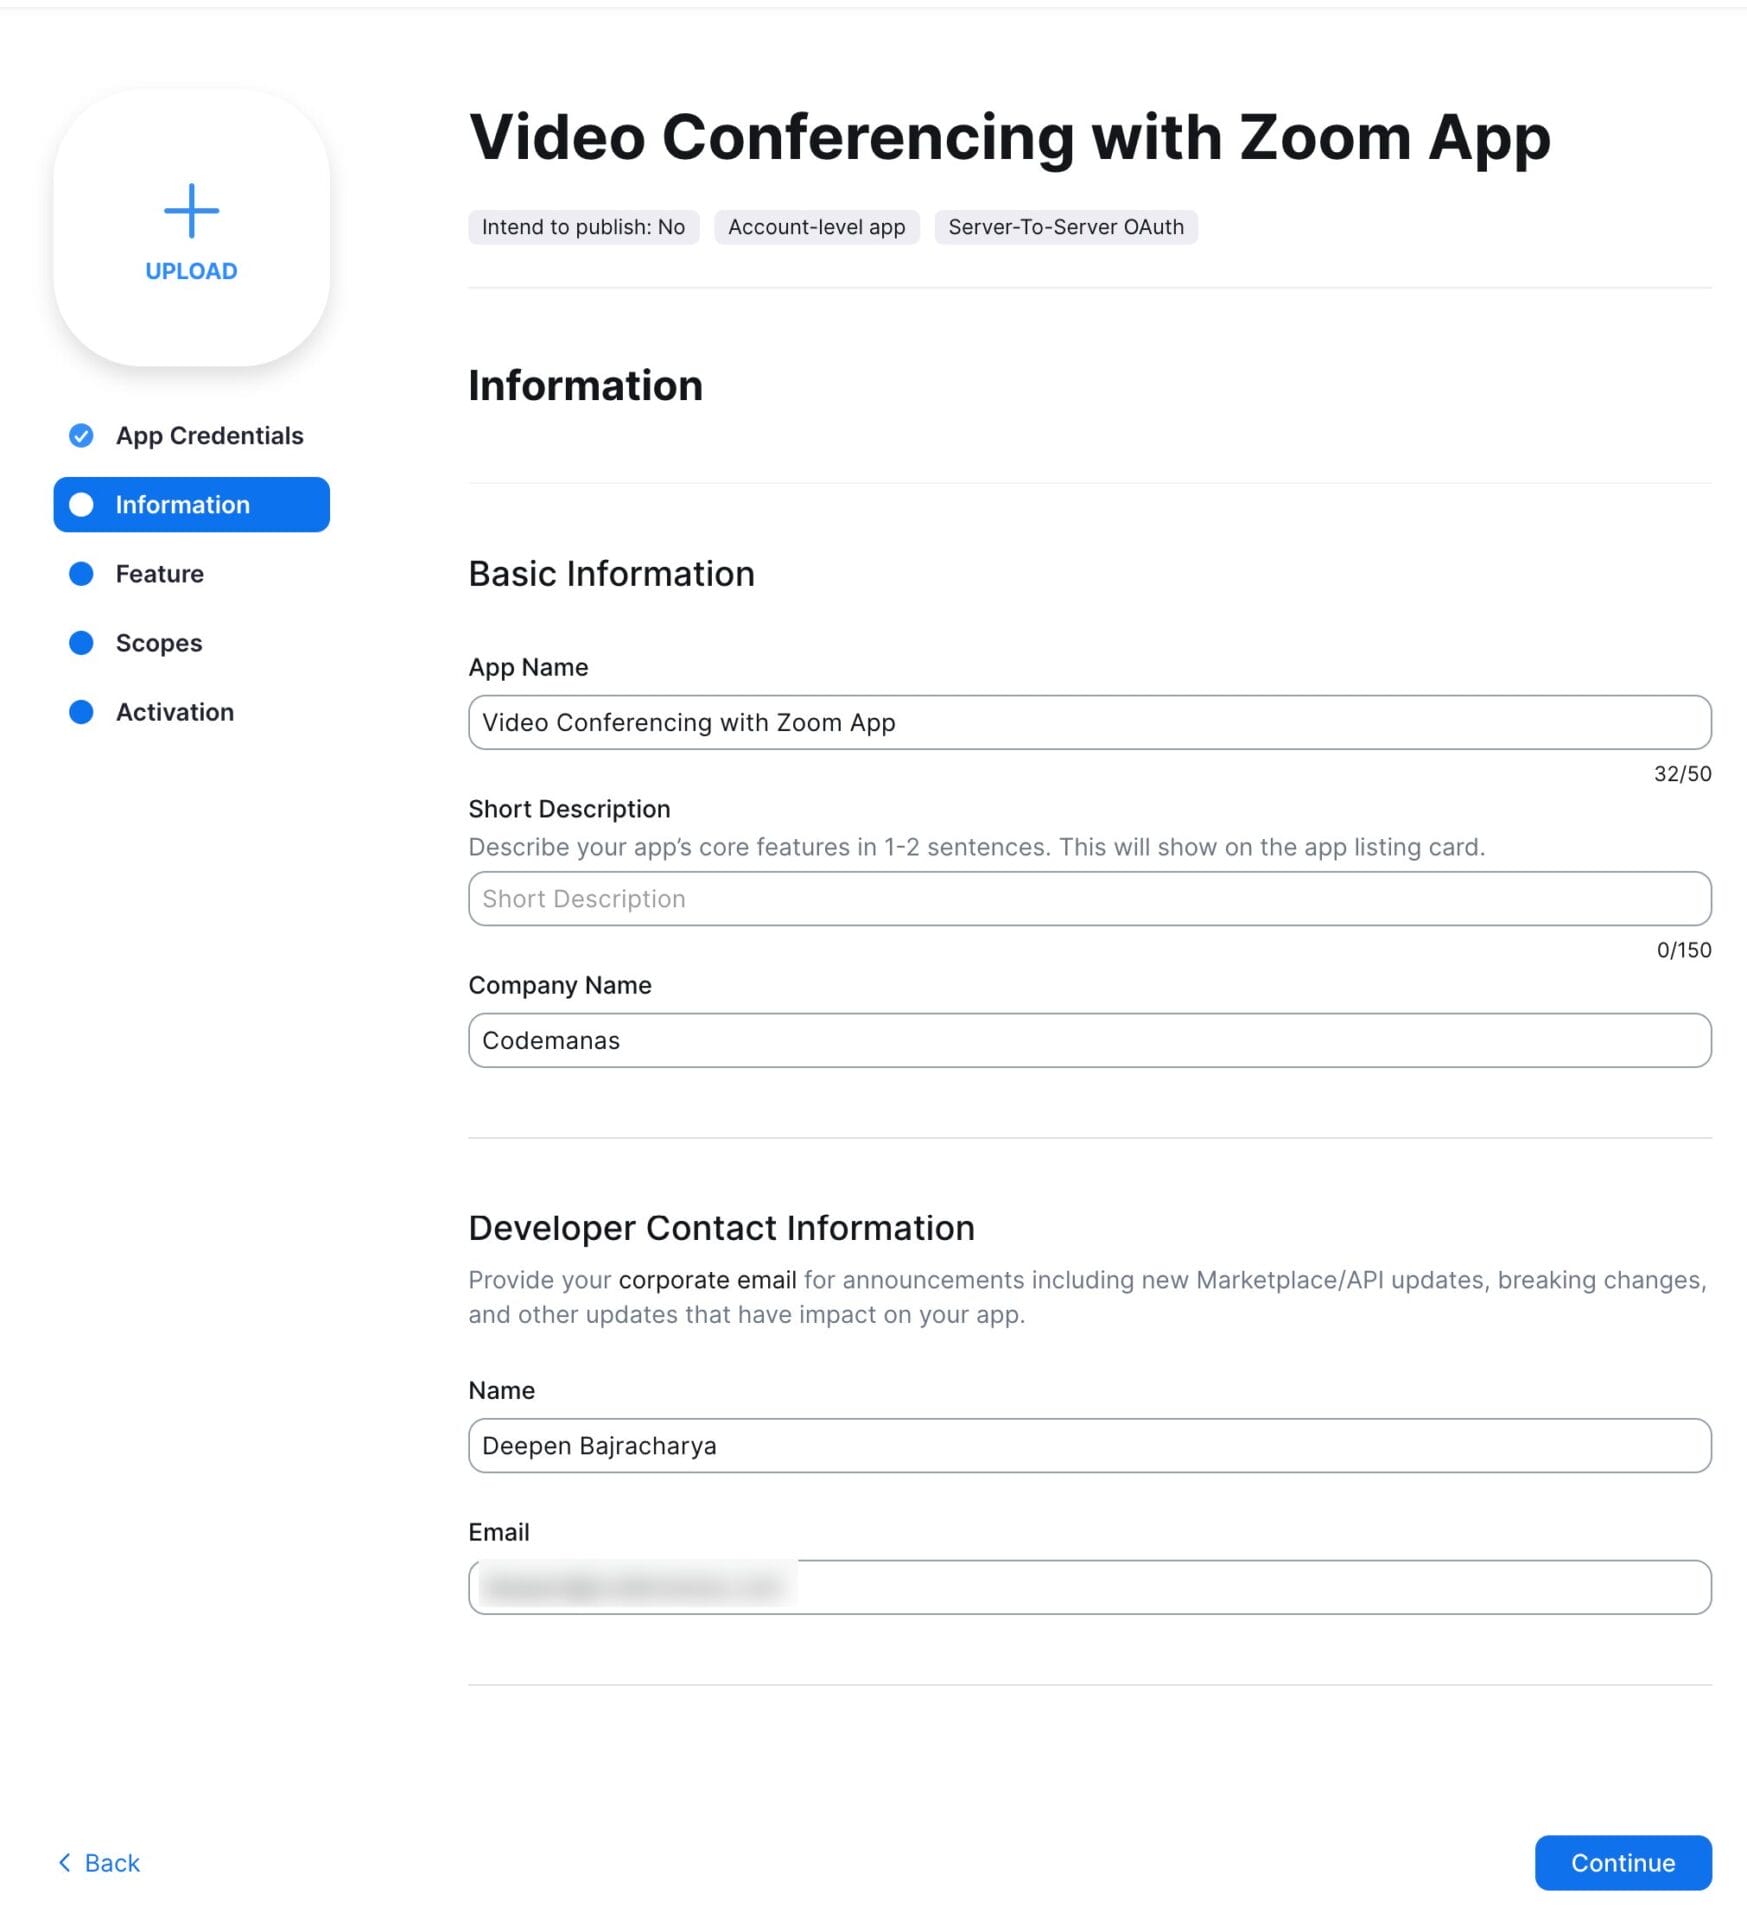
3. Information Page
In this next step you will need to add Contact name, Contact email and Company name on the information page in order to activate this app type. Fill in the details according to your needs.
4. Scopes Page
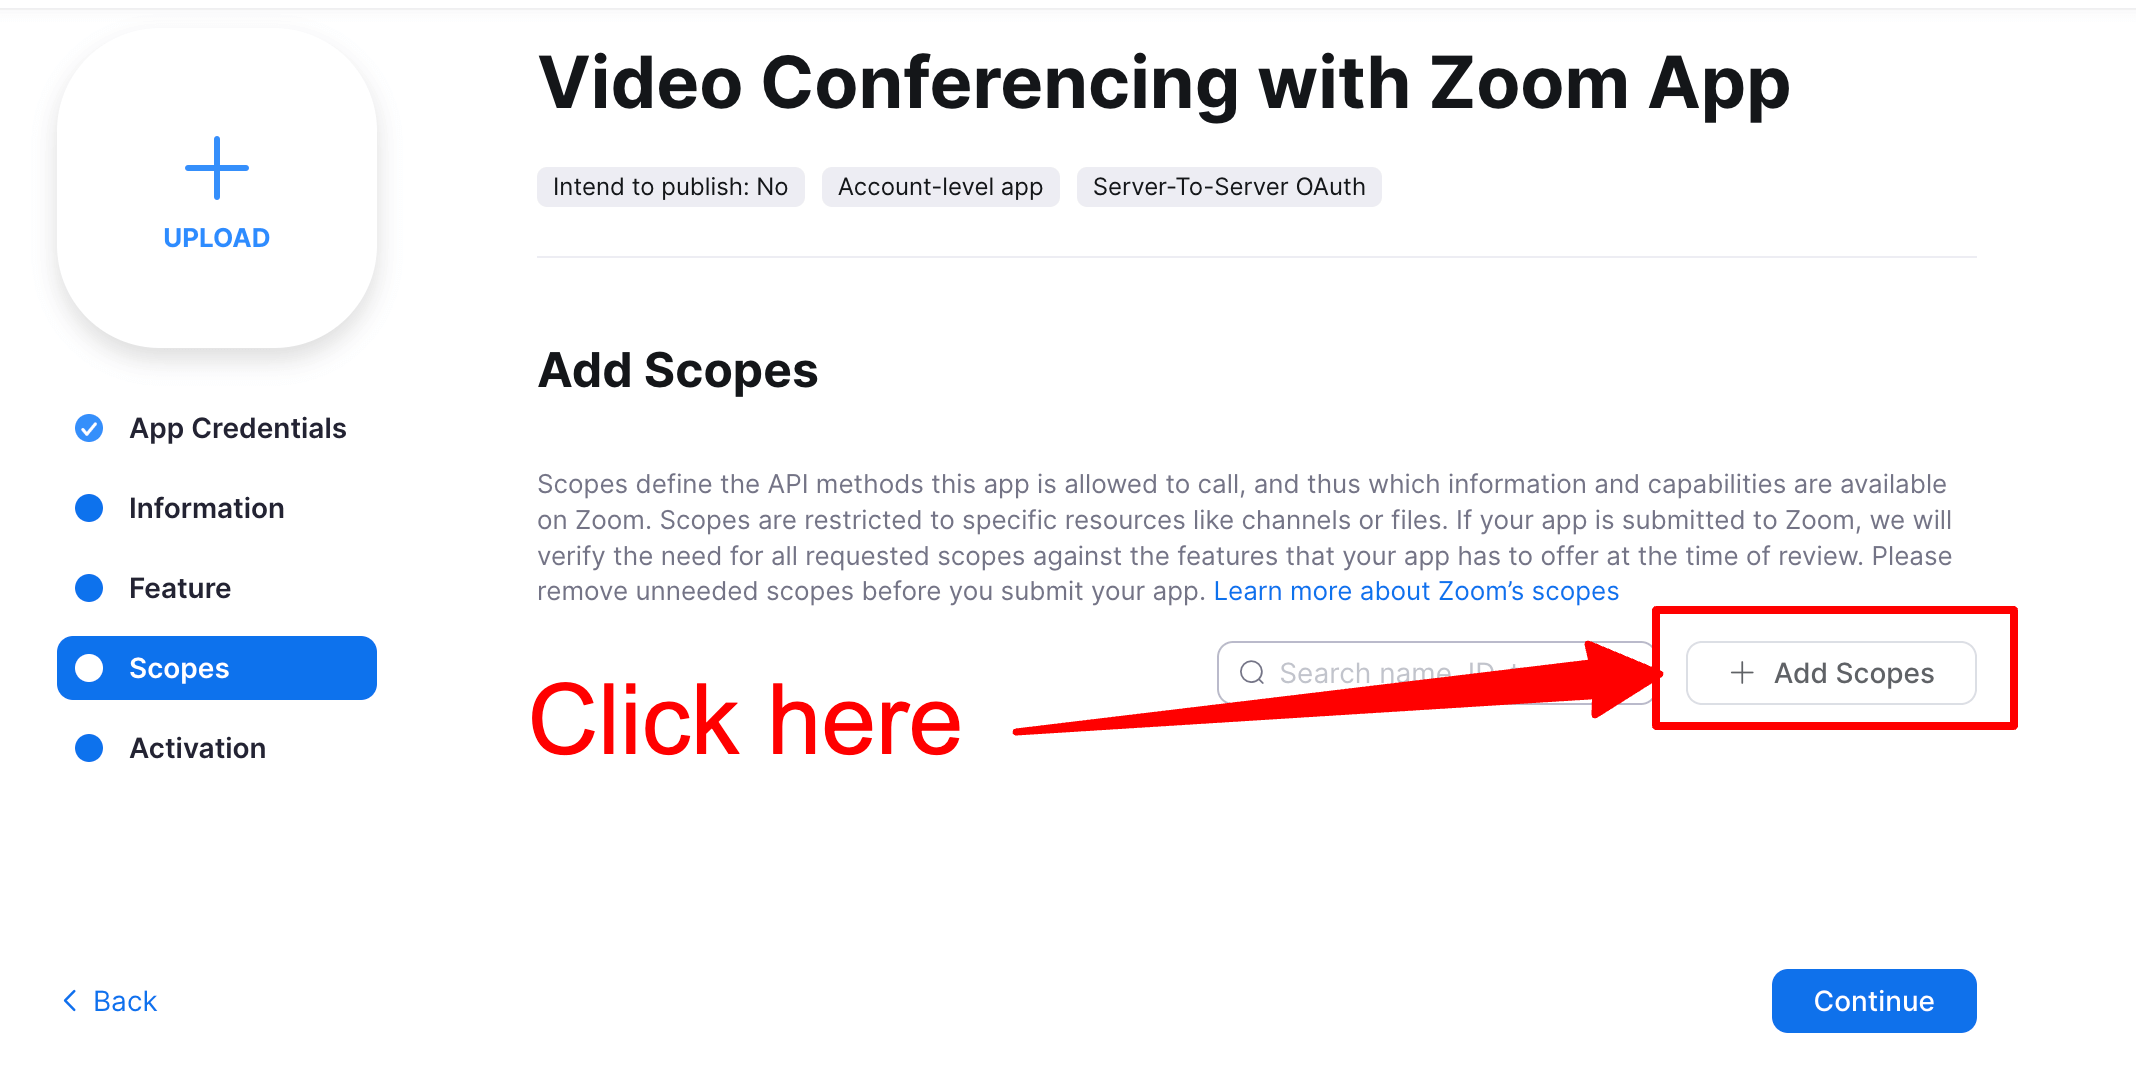
Ignore “Feature” page – After you’ve added details from previous step – Goto Scopes page from the left navigation menu and Click on “Add Scopes” as highlighted in the screenshot.
Scopes are basically added in order to allow permissions to access your Zoom meetings into Video Conferencing Zoom plugin. So, this step is very crucial step and you should properly assign each of the defined scopes properly otherwise you will get no permission issues when trying to create,delete or access Zoom Meetings from your WordPress site.
See Required Scopes section. in order to add necessary permissions. Come back to this step after you’ve added all the necessary permissions.
5. Activation
Finally, click on the Activate your App button, and you activated.
Required Scopes:
These below are the scopes required from step 4 when setting up the scopes for your application.
Note: Not adding any of the below permissions may result in permission issue error notices when trying to create your meeting/webinars.
Meetings
- View all user meetings
- View a meeting/meeting:read:meeting:admin
- View a user’s meetings/meeting:read:list_meetings:admin
- View and manage all user meetings
- Update a meeting/meeting:update:meeting:admin
- Delete a meeting/meeting:delete:meeting:admin
- Create a meeting for a user/meeting:write:meeting:admin
- View and manage sub account’s user meetings/meeting:master
- Create a meeting for a user/meeting:write:meeting:master
- View a user’s meetings/meeting:read:list_meetings:master
- Delete a meeting/meeting:delete:meeting:master
- Update a meeting/meeting:update:meeting:master
- View a meeting/meeting:read:meeting:master
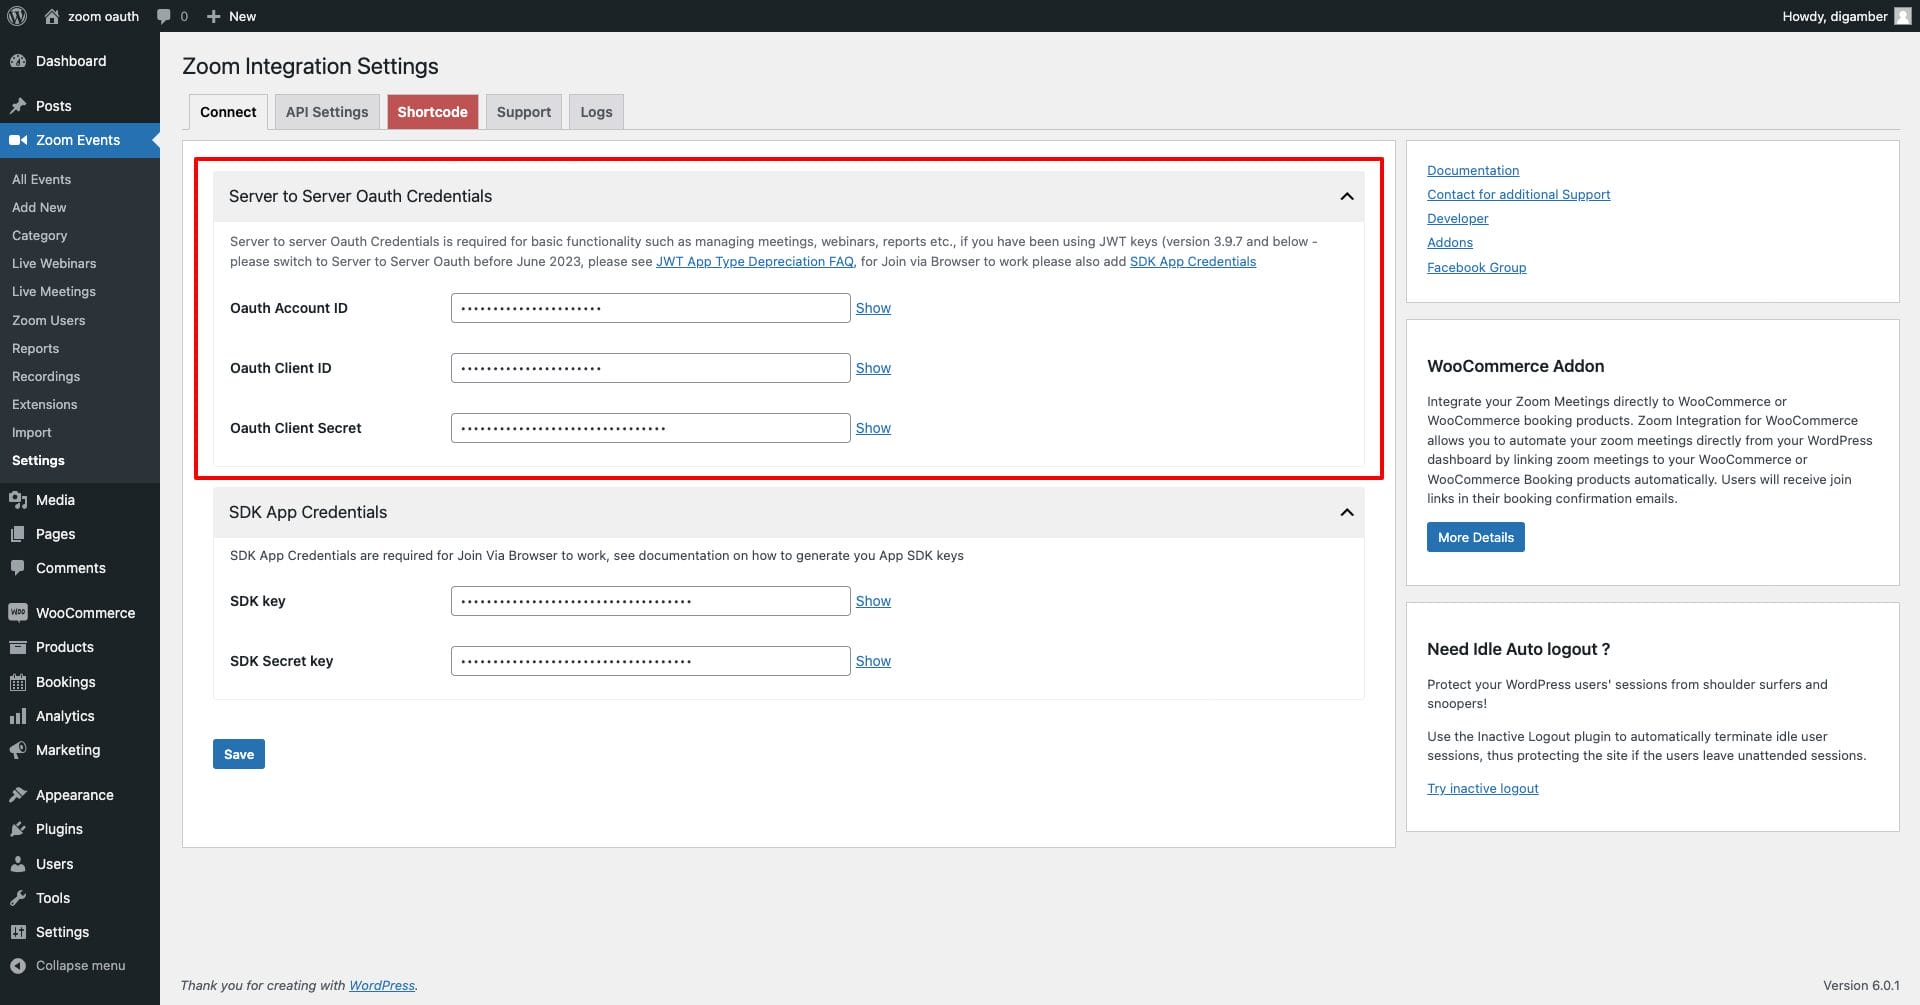
Adding Server-to-Server OAuth Credentials to the plugin
Login to your WordPress site as an Administrator and goto WordPress admin dashboard page and goto Zoom Events > Settings page.
- Go to Zoom Events > Settings > Connect tab
Step 3: Create and Embed a Zoom Meeting
- Go to
Zoom Meetings>Add New. - Fill in all the meeting details like the title, date, time, and description.
- Save your meeting.
- To link this meeting to a LearnDash course, open the course, lesson, or topic where you want to add the meeting.
- Use the Zoom Meeting block or shortcode to embed the meeting directly into your content.
- Once you’re done, hit
UpdateorPublishto make the meeting live.
Step 4: Test Your Integration
- Preview the course to ensure that the Zoom meeting is correctly embedded.
- Double-check that students can join the meeting smoothly and without any issues.
This plugin makes integrating Zoom with your LearnDash courses incredibly straightforward, giving you a hassle-free way to manage live meetings directly from your WordPress site.

